Manjaro用のセキュリティソフト、UFWをみていきます。
UFWとは
Uncomplicated FireWall(複雑ではないファイアーウォール)の頭文字をとってUFWとの名前になっています。
UFWは、簡単に使用できるように設計された少数のシンプルなコマンドで使えるファイアウォールの管理プログラムです。
内部の設定には、iptablesを使用しています。UFWは、8.04 LTS以降のすべてのUbuntuでデフォルトで使用可能になっています。
Gufwは、Uncomplicated Firewallのグラフィカルユーザーインターフェイス版です。
もともとGufwはUbuntuのために開発されたものですが、DebianベースのディストリビューションやArch Linux、Manjaroなど、UFWが利用可能な環境なら実行可能です。
ではUFW、Gufwの使い方を、Manjaroの公式ページを翻訳しながらみていきます。
Firewalls
Overview
Running a local firewall is almost always a good practice. Even when you are behind a network firewall, a local firewall protects you from threats on the inside of your network.
概要
ローカルファイアウォールを実行することは、良い習慣であることがほとんどです。
ネットワークファイアウォールの背後にいる場合でも、ローカル・ファイアウォールは、ネットワーク内部の脅威から保護します。
UFW
UFW stands for Uncomplicated FireWall, and is a program for managing a netfilter firewall. It provides a command line interface and aims to be uncomplicated and easy to use. UFW is far simpler than iptables and a good place to start unless you have very specialized needs.
UFW
UFWはUncomplicated FireWallの略で、netfilterファイアウォールを管理するためのプログラムです。
コマンドラインインターフェイスを提供し、複雑でなく、使いやすいことを目的としています。UFW は iptables よりもはるかにシンプルです。よほど専門的なニーズがない限り、手始めに使うのにおすすめです。
installing UFW
You can install the ufw package using you favorite package manager or the command:
UFWのインストール
UFWパッケージは、お好みのパッケージマネージャまたはコマンドを使用してインストールすることができます。
pamac install ufw
Once UFW is installed you need to start and enable it using the commands:
UFW をインストールしたら、以下のコマンドを使用して起動し、有効化する必要があります。
sudo systemctl enable ufw.service
sudo ufw enable
Warning
Don’t enable both iptables.service and ufw.service
警告
iptables.serviceとufw.serviceの両方を有効にしないでください。
Adding Rules
To view the current configuration you can use the command ufw status. Here is what it looks like in a new install:
ルールの追加
現在の設定を表示するには、ufw statusコマンドを使用します。新規にインストールした場合はこんな感じです。
sudo ufw status verbose
Status: active
Logging: on (low)
Default: deny (incoming), allow (outgoing), disabled (routed)
New profiles: skip
This indicates that it will block all incoming traffic and allow all outgoing traffic. This is a good starting point for most desktop systems. However, often we will want to allow some incoming traffic. This can be done with the command ufw allow. For example, if we want to allow incoming ssh traffic so we can connect to the machine from other machines on the network we could use the command:
これは、すべての着信トラフィックをブロックし、すべての発信トラフィックを許可することを示します。これは、ほとんどのデスクトップシステムにとって良い出発点です。
しかし、いくつかの受信トラフィックを許可したい場合があるでしょう。これは ufw allow コマンドで実行できます。
例えば、ネットワーク上の他のマシンからマシンに接続できるように、sshトラフィックの着信を許可する場合は、次のコマンドを使用します。
sudo ufw allow ssh
If we wanted to also tcp connections to a local webserver on a non-standard https port, 8443. We could use the command:
もし、ローカルの Web サーバーへの tcp 接続を非標準の https ポート、8443 で行いたい場合。コマンドを使用することができます。
sudo ufw allow in 8443/tcp
Tip
When you don’t specify “in” or “out”, “in” is assumed
補足
in “または “out “を指定しない場合、”in “とみなされます。
UFW and Applications
You may notice a difference in the above two commands. When we built the rules for ssh we used the name and for https we used the port number, 8443. This is because UFW has a small database of applications it knows the ports for. You can see the list with the command:
UFWとアプリケーション
上記の2つのコマンドの違いにお気づきでしょうか。sshのルールを作るときには名前を使い、https のルールにはポート番号の 8443を使いました。
これは、UFW がポート番号を知っているアプリケーションの小さなデータベースを持っているためです。コマンドでそのリストを見ることができます。
sudo ufw app list
For applications on the list you can add them by name. If you want to review the configuration for one of the applications, you can use the command ufw app info. For example, to the configuration for ssh:
リスト上のアプリケーションについては、名前を指定して追加することができます。あるアプリケーションの設定を確認したい場合は、ufw app info コマンドを使用します。例えば、ssh 用の設定に。
sudo ufw app info SSH
Profile: SSH
Title: SSH server
Description: SSH serverPort:
22/tcpTip
When using ufw app the commands are case sensitive but when adding rules they are not
Some additional preconfigured applications can be added by installing the package ufw-extras with your favorite package manager or the command:
ヒント
ufw アプリを使用する場合、コマンドは大文字と小文字を区別しますが、ルールを追加する場合は区別されません。
いくつかの設定済みアプリケーションは、お好みのパッケージマネージャまたはコマンドで ufw-extras パッケージをインストールすることにより追加することができます。
pamac install ufw-extras
Removing Rules
Rules can be removed with the ufw delete command. For example, to delete our 8443 rules we could use the command:
ルールの削除
ルールは ufw deleteコマンドで削除することができます。たとえば、8443ルールを削除するには、次のコマンドを使用します。
sudo ufw delete allow 8443/tcp
You can also delete them by number. This is easier if you have a numbered list which you can see with the command:
また、番号で削除することもできます。コマンドで確認できる番号付きリストがあれば、この方法は簡単です。
sudo ufw status numbered
Status: active
To Action From
— —— —-
[ 1] 22 ALLOW IN Anywhere
[ 2] 22 (v6) ALLOW IN Anywhere (v6)
Now if we wanted to stop allowing ssh on ipv6 we could use the command:
さて、もしipv6でのsshを許可しないようにしたい場合は、このコマンドを使うことができます。
sudo ufw delete 2
GUFW
GUFW
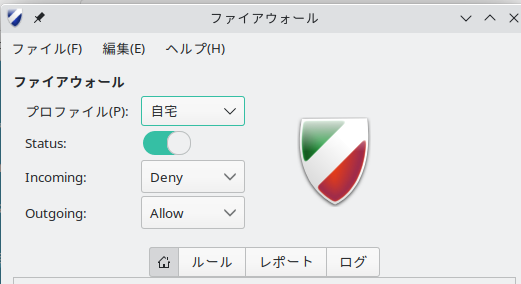
Prefer to use GUI applications and still want to manage your firewall? No problem. GUFW is a GTK front-end for UFW that aims to make managing a Linux firewall as accessible and easy as possible. It features pre-sets for common ports and p2p applications.
GUIアプリケーションを使いたいが、ファイアウォールを管理したい?問題ありません。
GUFWはUFWのGTKフロントエンドで、Linuxファイアウォールを可能な限りアクセスしやすく、簡単に管理できるようにすることを目的としています。一般的なポートやP2Pアプリケーションのためのプリセットが特徴です。
If it is not installed already gufw can be installed from the repos:
まだインストールされていない場合は、レポジトリからインストールすることができます。
pamac install gufw
It will now be available in the menu as Firewall Configuration or by running gufw directly.
これで、メニューのFirewall Configurationから、または直接gufwを実行することで利用できるようになります。
iptables
iptables is included as part of the Linux kernel. iptables is significantly more complicated than using a tool like UFW. As a result, a full tutorial on iptables is beyond the scope of this wiki. Using iptables on Manjaro should be the same for every distribution of Linux so there is plenty of available documentation. Some of this is linked below. Here are some basics to get you started.
iptables
iptables は Linux カーネルに含まれています。iptables は UFW のようなツールを使うよりもかなり複雑です。そのため、iptables の完全なチュートリアルは、この wiki の範囲を超えています。
Manjaro で iptables を使うことは、Linux のどのディストリビューションでも同じはずなので、たくさんの利用可能なドキュメントがあります。そのうちのいくつかは以下にリンクされています。ここでは、使い始めるための基本的なことを説明します。
To enable loading rules on startup you can use the command:
起動時にルールをロードするようにするには、コマンドを使用します。
sudo systemctl enable iptables.service
This will load the rules from the file /etc/iptables/iptables.rules.
To display the currently loaded rules:
現在読み込まれているルールを表示する。
sudo iptables -L
To save the current rules to a file
sudo sh -c "iptables-save > /etc/iptables/iptables.rules"/etc/iptables/iptables.rules" " aria-disabled="false">
To load the rules from a file
ファイルからルールを読み込むには
sudo sh -c "iptables-restore > /etc/iptables/iptables.rules"/etc/iptables/iptables.rules" " aria-disabled="false">
To allow ssh connections
ssh接続を許可する場合
sudo iptables -A INPUT -p tcp --dport 22 -m conntrack --ctstate NEW,ESTABLISHED -j ACCEPT
sudo iptables -A OUTPUT -p tcp --sport 22 -m conntrack --ctstate ESTABLISHED -j ACCEPT